
This article focuses on the choice of tunnels to trap, a crucial step in our comprehensive guide to mole trapping with the Putange trap.
Where to set a mole trap? Which tunnel to trap? The mole catcher’s guide
Are you fed up with molehills and moles destroying your garden? On this page, I will explain exactly which tunnels to place the Putange traps in! As an experienced mole catcher, I’ll share my insights and all the essential knowledge about the areas to trap with the Putange.
I hope this page helps you free your garden from mole invasion. If you have any questions at all, feel free to ask them in our Facebook group or by email at alexis@quicktaupe.com, and I will gladly answer every time!
Let’s get ready to turn the tide and win your fight against moles.
Trapping the Main Tunnel
The main tunnel is the most frequently used by the mole (up to 6 times a day), making it the location with the highest chance of capture.
This strategic advantage for trapping is compounded by the fact that it’s the only tunnel moles typically share, as it connects their various tunnel networks. While moles are solitary, they can indeed utilize the main tunnel communally.
Therefore, when dealing with a mole in your garden, the holy grail is to locate the mole’s main tunnel for effective trapping with Putange traps.
How do you find the main tunnel? It’s very simple:
Look for an alignment of 3 to 5 molehills, and you’re there. This alignment often follows a distinct feature such as a terrace, a hedge, a gravel path, a river, a ditch, or a fence. Scan your garden, and if you spot a clear line of 3 to 5 molehills, you’ve found the main tunnel.
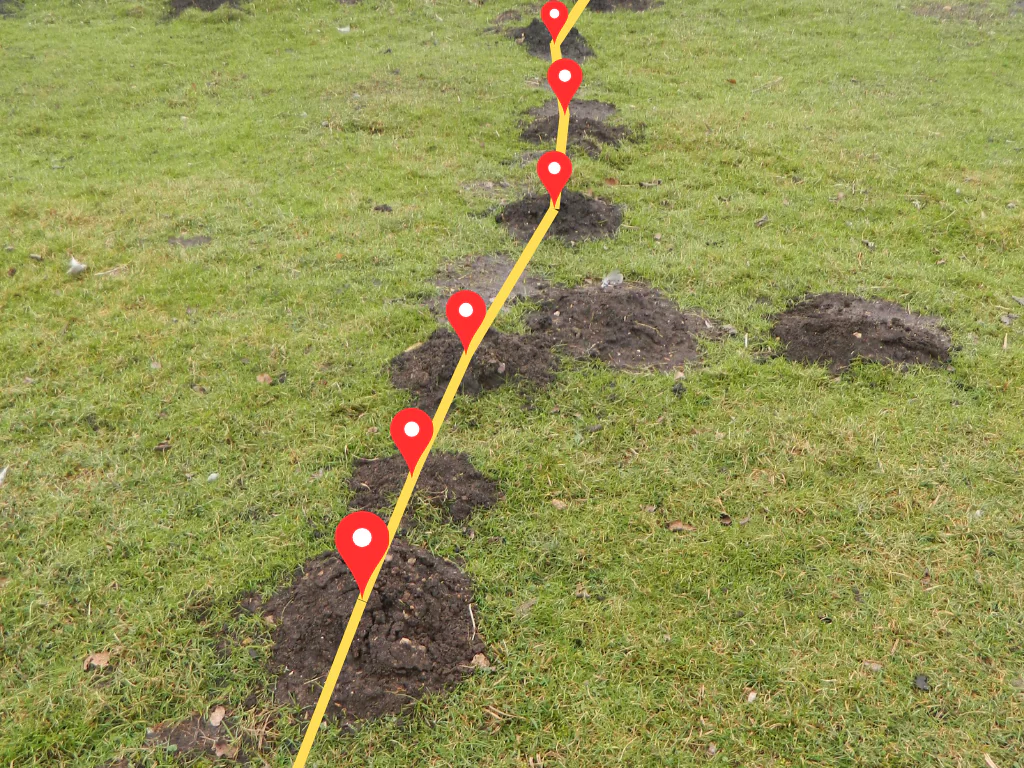
2) Open the molehill closest to the center of this line and set your trap. Normally, you’ll only find one entry and one exit, as the path extends from the previous molehill to the next.
3) Return in 48 hours to check your trap!
Why do I advise trapping in both directions? Firstly, because you don’t know which way the mole will approach from. Secondly, because the tunnel is shared among several moles, you can catch them coming from either direction.
Once, at a client’s property (whom I thank for their kindness), I captured a mole in each of the traps I had set in the same molehill. It was quite surprising to suddenly catch two moles in the same spot, one having come from each side!
Trapping tunnel intersections
You’ll also observe that a network of tunnels and molehills has different branches. Some of these branches converge on a single molehill, which serves as an intersection.
When a molehill connects several other tunnels, you should be aware that you’ll have more than just one entry and one exit. Therefore, you’ll need to trap all the tunnels you find there.
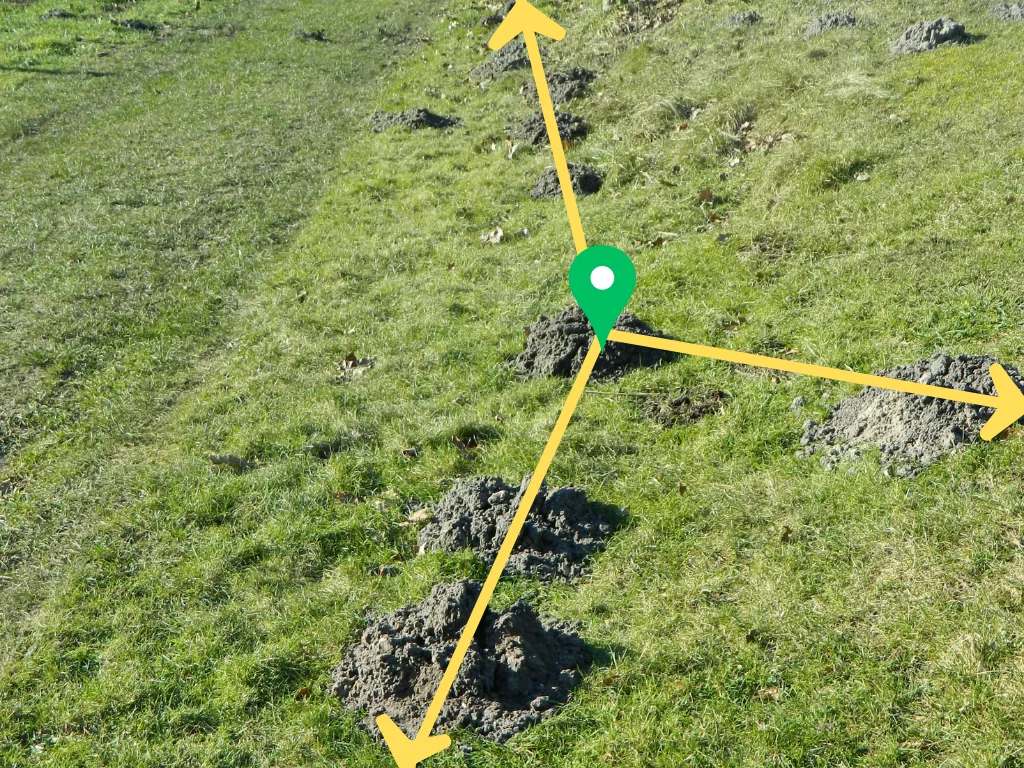
This approach maximizes your chances of capturing the mole, as you’re certain that if it passes through any branch of its network, it must pass through the molehill you’ve trapped.
When considering where to place the Putange trap, you should always begin by locating the main tunnel, and then proceed to identify molehill intersections.
Trapping moles under paving slabs, ponds, stones, etc.
Now, I’m going to share a little technique I have that works extremely well! Sometimes in gardens, there might be a stray concrete block, a paving slab, or an empty pond that can be moved. When a mole is in the area, it often uses these as support to construct its tunnels underneath.
By lifting them, you might gain direct access to the tunnel, allowing you to observe all the ramifications of its network at that spot.
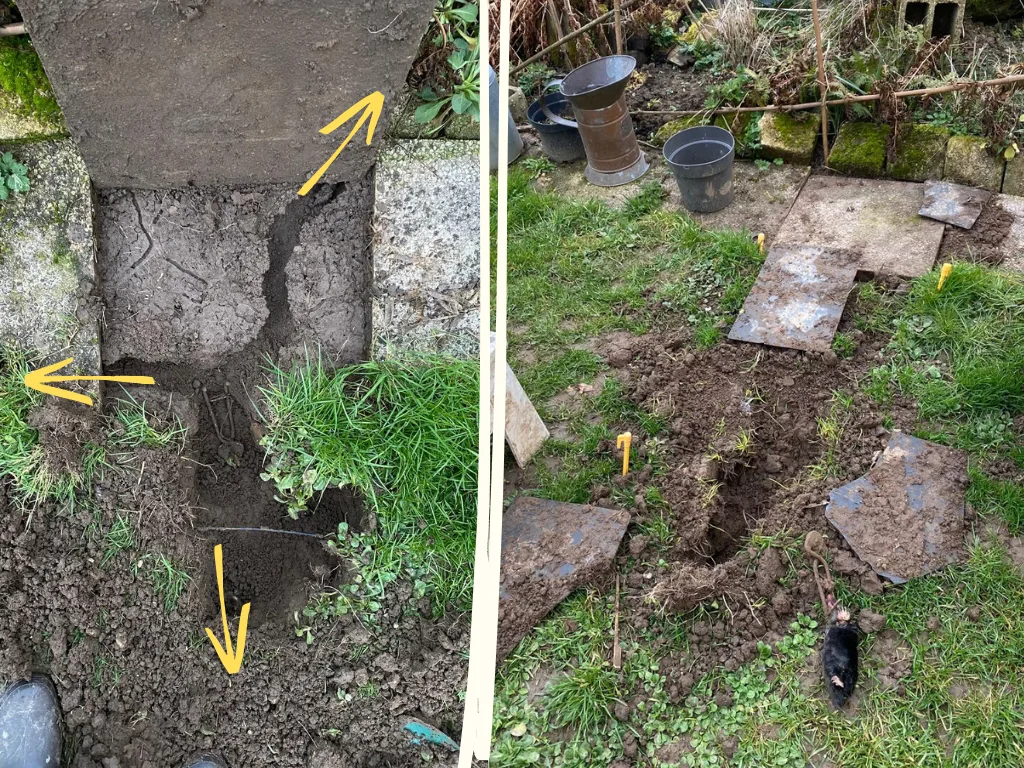
You’ll then simply need to place a trap in each direction you observe, then replace the stone, slab, pond, or other item.
Return in 3 days to find the mole in your trap! This method is practical for mole trapping because moles almost always rely on existing landscape features for support. So, if you see molehills near these elements, there’s a very high chance one of the tunnels passes directly underneath.
This is another very easy-to-find spot to place Putange traps!
Trapping moles along fences, roads, borders, under hedges, etc.
As I’ve mentioned, moles tend to tunnel along natural features in your garden or the land you’re working on.
Very often, a mole tunnel runs along a hedge, and you can’t see it until you lift the lower foliage. Make sure to thoroughly check your entire garden to see if this is the case for you, and don’t just rely on appearances.
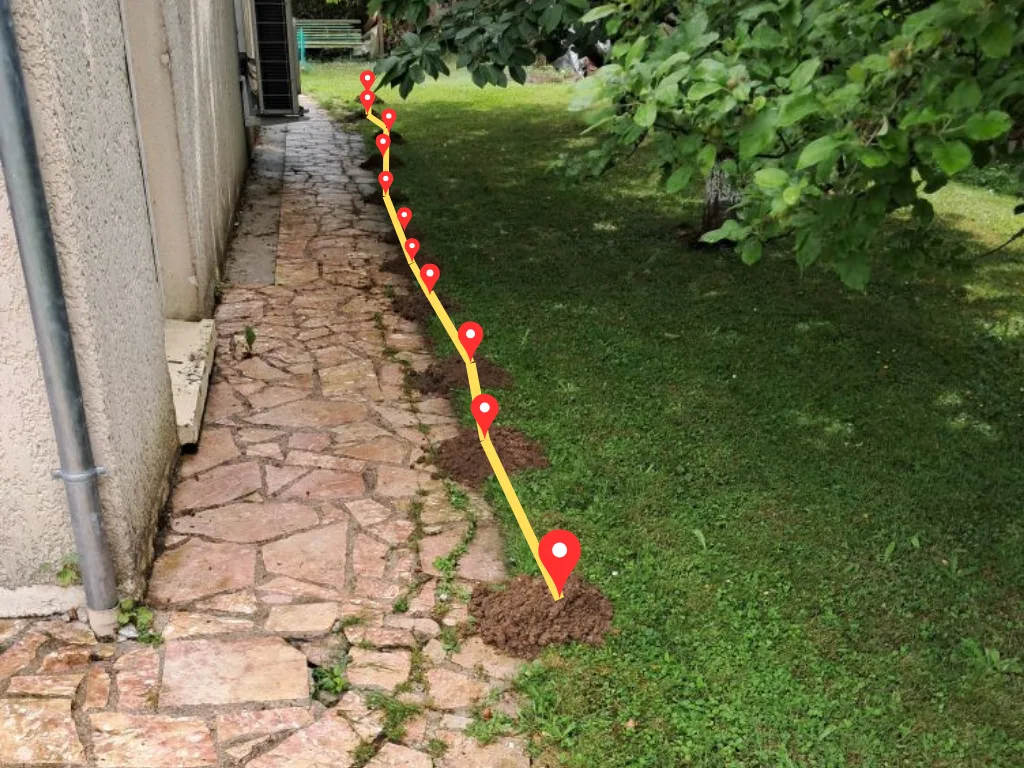
Just because molehills aren’t visually apparent along a hedge doesn’t mean they aren’t there. Check by lifting dead leaves and foliage to confirm their presence.
If you find molehills under your hedges, along a fence, tarp, or pathway border, then set a trap in a molehill at the center of the line; in 90% of cases, you’ll be on a main tunnel.
Trapping Fresh Molehills
Suppose you are not facing any of the scenarios mentioned previously: no molehills along an edge, no stones with tunnels running underneath, and no visible main tunnel. You may feel you are in a tough spot.
However, it is not as difficult as it seems.
First, flatten all existing molehills and wait five days to see which ones the mole rebuilds. This will show you exactly where to set your traps. In five days, the mole will have had time to rebuild its main tunnel and feeding tunnels. If you create an opening in its molehills or remove the soil on top, an active mole in the area will quickly return to plug the hole or rebuild the mound.
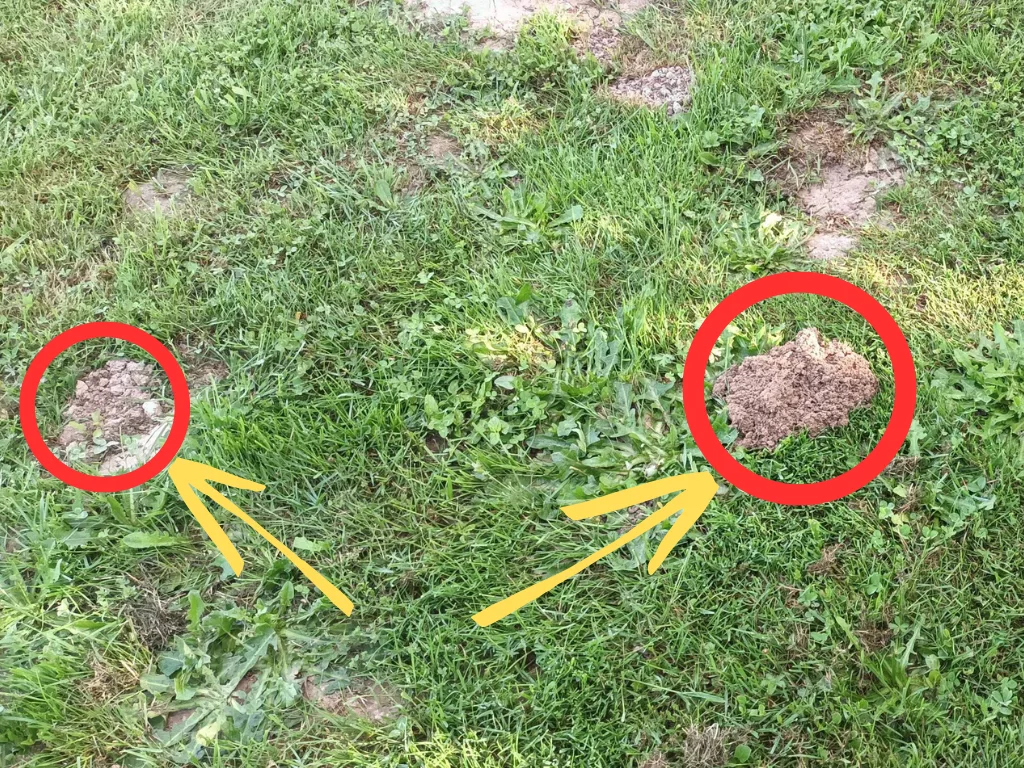
You will now know precisely where to set the traps: right where a molehill has been rebuilt.
Allow the mole time to re-establish its tunnel system to more broadly detect its active areas. This is where you will catch it. You will have a whole cluster of fresh molehills ready for trapping.
Can Surface Tunnels Be Trapped?
Surface tunnels are shallow passages that create raised ridges on the ground. Often, there are no molehills at these locations because the mole is simply pushing up the top layer of soil rather than digging a deep tunnel.
You are often told not to trap surface tunnels, but this is a myth. Since few resources explain how to trap them, many find it simpler to advise against it.
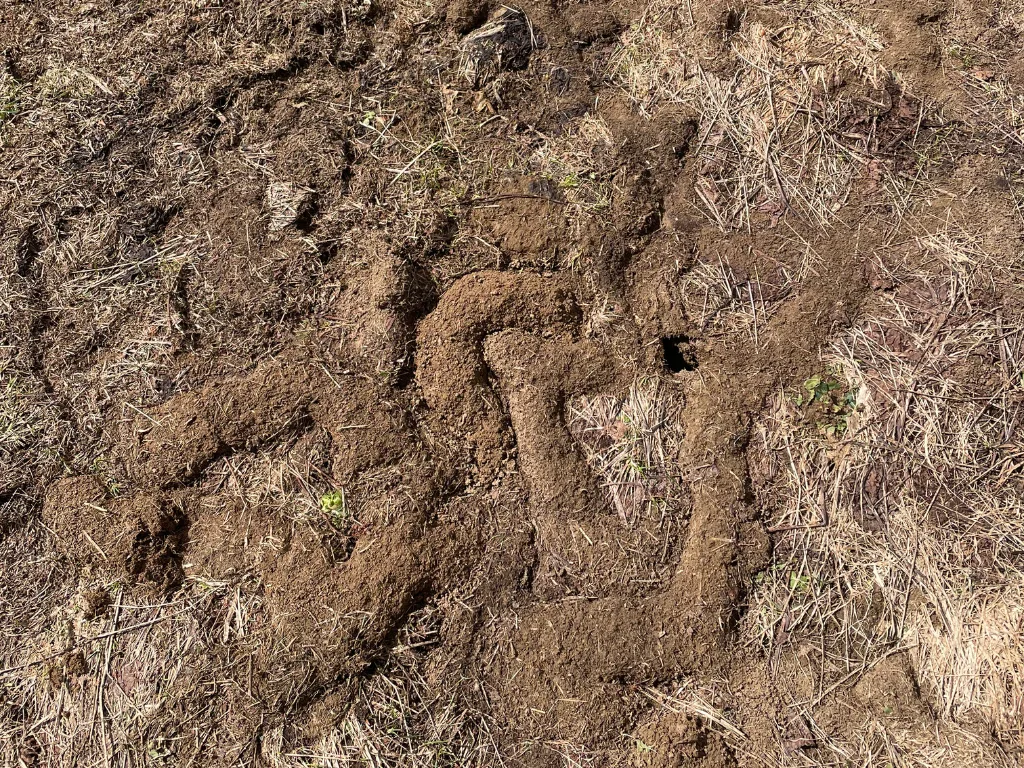
This photo shows what a surface tunnel looks like. Here the grass is very dry, but the appearance is identical on a green lawn: you will see raised lines of earth forming the tunnels.
I have caught plenty of moles in surface tunnels; you just need to understand a few principles to succeed.
Firstly, surface tunnels are typically created by males searching for females during the mating season, or by young moles establishing their independence. This is a highly seasonal activity; the moles are only present during the mating season or for a few weeks after the young are born (generally April–May). If you are in this period, it is the perfect time to trap them.
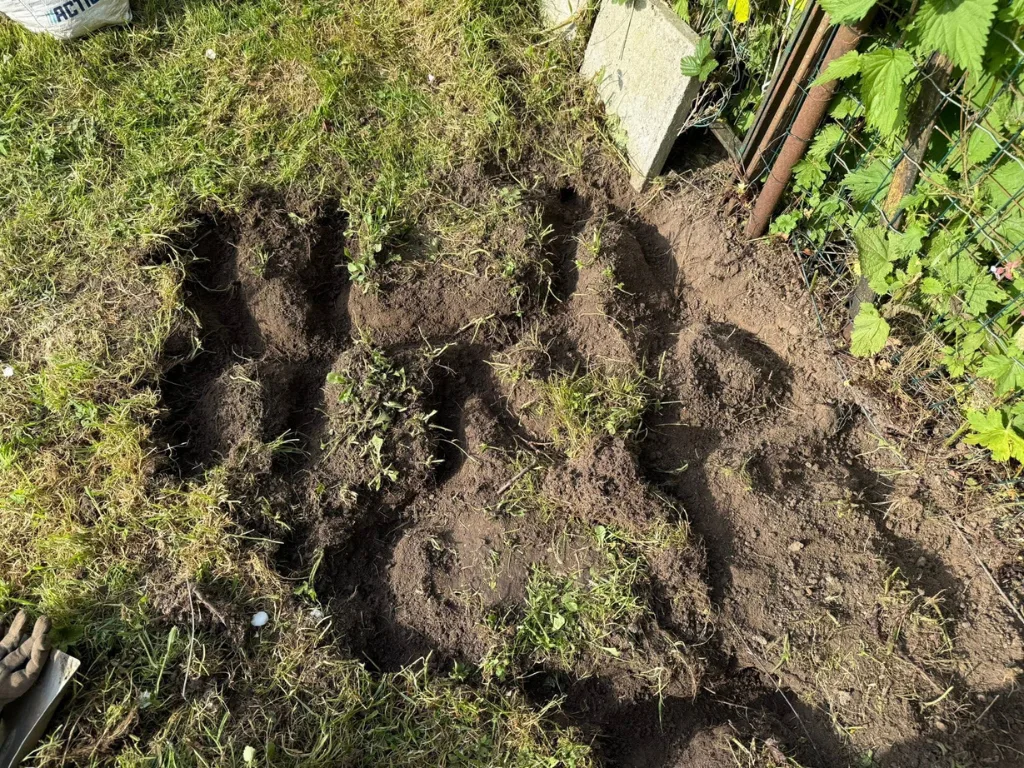
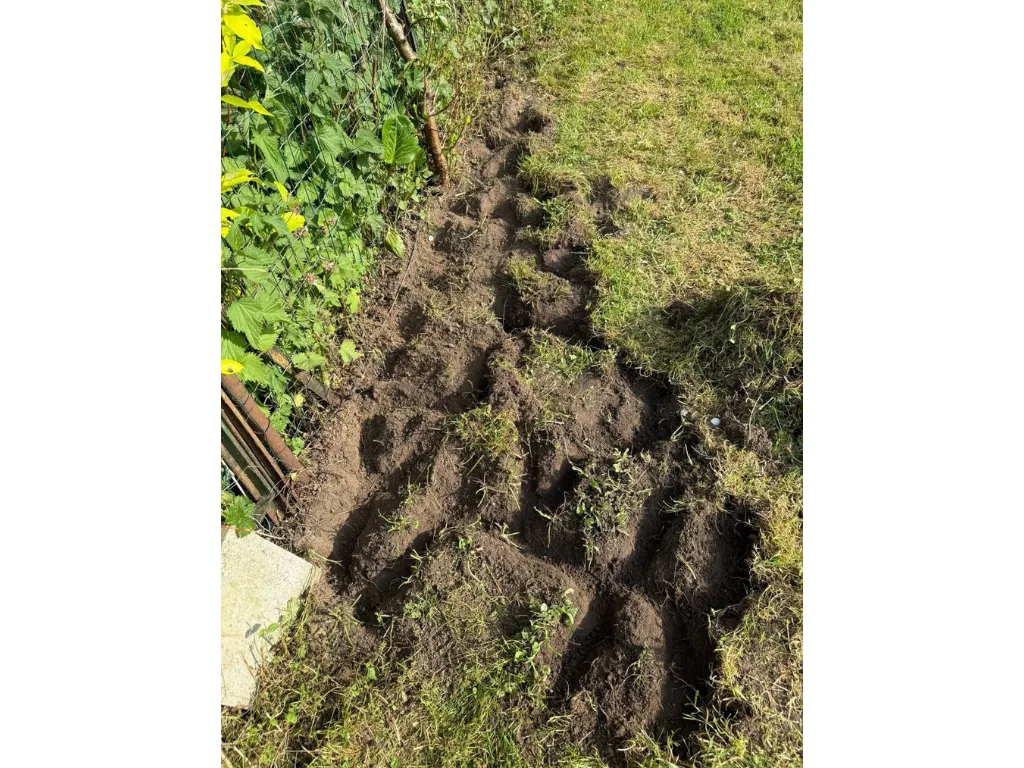
2) The included photo shows what a surface tunnel would look like if opened completely, but it is provided only as an example. You should not open the tunnel this much. To set a trap, the process is even simpler than trapping in a deep tunnel. With your finger, pierce a surface tunnel, clear a small amount of earth to create an access point, then place a Putange trap inside, set to trigger from either direction. That is all it takes.
[See suggestion 1] In my photo, I would have opened a very small area, 15 centimeters maximum, to slide one trap into the center of the tunnel.
3) Lightly cover the hole you made with soil and return in 48 hours to check your traps.
Surface tunnels are extremely simple to trap. You will recognize them easily by the raised ridges they form on your lawn. When you step on them, they collapse immediately, feeling soft like a small cushion underfoot.
It is also important to know that surface tunnels always have a specific entry point. The mole creates the tunnel system from a precise spot, and often at this single location, there is a molehill or a very small mound of earth. If you trap at this spot, you will have a greater chance of capturing it. If this entry point is not visible, simply set your trap in any clear section of a surface tunnel.
Mole Trapping Advice
Here’s a professional English translation of your advice, with a focus on clarity and conciseness:
Mole Catcher’s Tip: One crucial detail when trapping moles in surface tunnels is to avoid crushing or flattening them. Doing so risks alerting the mole to your presence.
While this isn’t an issue with deeper tunnels, it’s extremely important for surface ones. You absolutely must not crush surface tunnels if you intend to trap them; otherwise, the mole will simply move on.
A Professional Guide to Advanced Mole Trapping Strategies
This guide covers professional strategies designed to optimize trapping efforts for those with a basic understanding of trap operation.
The focus is on long-term territory management and the strategic placement of traps to maximize efficiency and success rates.
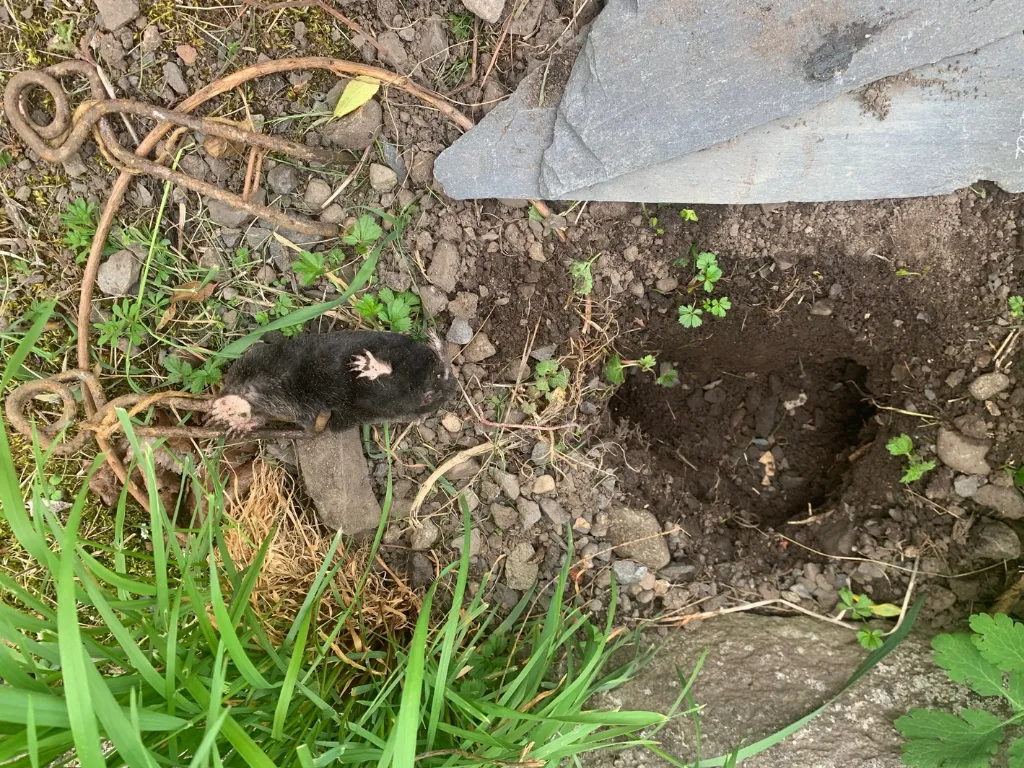
Strategy 1: Preventive Re-trapping in Productive Areas
When a mole is captured from a tunnel network, the territory becomes unoccupied and may soon be inhabited by a new mole.
For this reason, professional mole trappers systematically reset a trap in a successful location as a preventive measure. This ensures that if a new mole takes advantage of the existing tunnel network, it will also be caught. It is common to capture several moles sequentially from the exact same spot.
Strategy 2: Optimizing Placement by Avoiding Low-Probability Zones
A key component of expert trapping is knowing where not to place traps. This section outlines several low-probability locations to avoid, allowing you to focus your resources effectively.
Do not set traps in the following locations:
The Largest Molehill in the Network: This is typically the mole’s nest, an area where the animal is exceptionally wary. It also features multiple entrances and exits, making trapping an ineffective use of your equipment.
Tunnels at the End of a Run: Avoid molehills at the very beginning or end of a tunnel system. These dead-end tunnels are infrequently used by the mole, significantly lowering the chance of a capture.
Isolated Molehills: These single mounds are usually the result of the mole digging for a minor food source. The mole will not return to these spots.
Open Molehills: If you see a molehill with a visible, open hole that remains uncovered for more than 24 hours, do not trap it. An active mole would have sealed the opening; an open hole indicates the mole has abandoned that part of the network.
Areas Near Trees: Avoid trapping within a 1.5-meter (approximately 5-foot) radius of a tree. You are very likely to encounter large roots, which makes setting a trap correctly impractical.
And to maximize your chances of capture, be sure to follow the advice on the positioning of the trigger on a Putange trap!


